using pictures for picasa and flickr that include geotag exif data

just received a picture that has geotag information in it. the only problem is: it seems that geotag isn’t equal geotag. the picture has GPSVersionID, GPSLongitudeRef and GPSLongitude tag in the exif data like it’s supposed to.
uploading this to flickr worked perfectly, it displays the town name and location where it was taken. pretty cool if you ask me. here’s an example:
geotaged flickr image

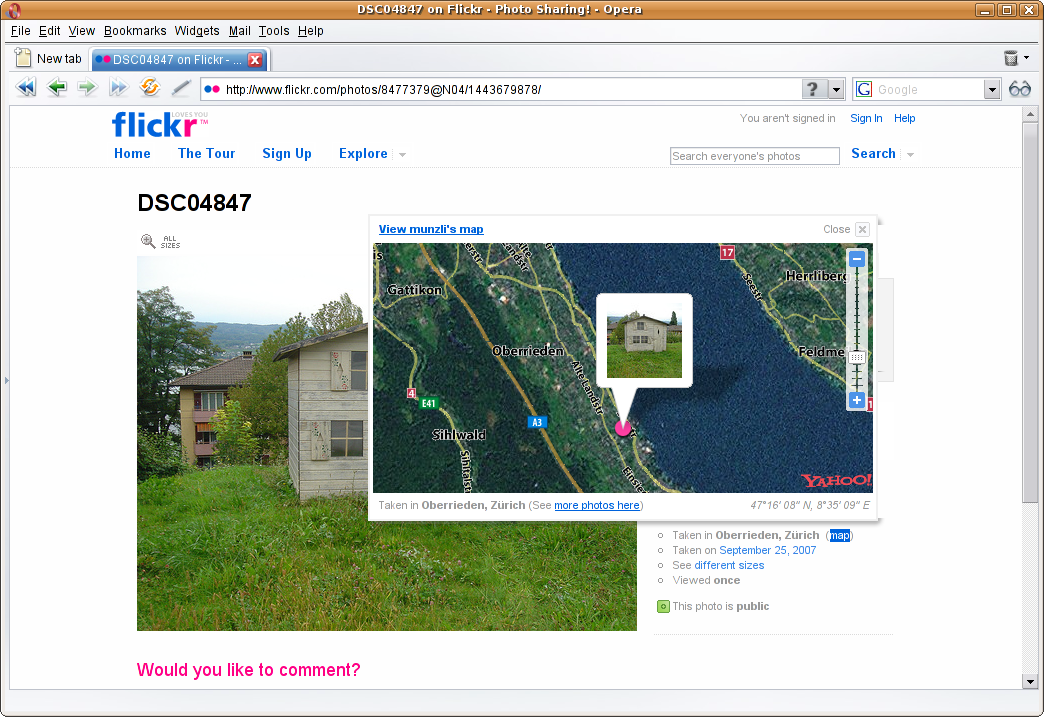
well now to the big problem, google picasa doesn’t understand this kind of geotag… how to fix this? well i found out that exiftool knows all kinds of cool exif data and can also rewrite them. what we need to do is change the GPSVersionID from “2.2.0.0” to “0.0.2.2”. GPSVersionID 2.2.0.0 is the default and basically means that it’s version 2.2, it seems that picasa doesn’t think so and wants it to be 0.0.2.2 (which seems to be more logical for a 2.2 version but i don’t really know who’s right here).

well what you can do is install exiftool, under debian/ubuntu that would mean:
sudo apt-get install libimage-exiftool-perl and for all you windows users you’ll have to download the zip file from the site mentioned above.

now all you need to do is rewrite the exif tag, to do this for a whole folder you’d use:
exiftool -GPSVersionID=0.0.2.2 -overwrite_original imagepath/*.jpg

then exiftool tells you how many images have been updated.

now let’s login to picasa and see what happens… after i uploaded the picture i went into the album and the picture is nicely placed on the map:
geotaged picasa image

no need to pick out the location or anything!

here’s my link to the picasa test and the flickr test.

only thing missing now is a GPS system :)

[update] for all you german users, if google isn’t set to english you won’t be able to see the map stuff on picasa because it’s english only atm.

[update2] i also noticed that there’s no need to change the exif GPSVersionID anymore for picasa to place the photo… nice…

coloring fg baja rims

well here’s something totally different that i thought i’d post about.

how to get you r/c rims, in my case my new baja rims from fg, colored in the color you’d like instead of the plain old white.

all you need to do is buy some textile coloring. the normal kind that you can buy in the drugstore, just make sure it’s suitable for acetate/nylon/polyamid.

i bought some yellow coloring from ideal. i’ve seen others do it with simplicol but i couldn’t find that stuff around here.

first things first, get your rims nice and clean. grease on the rims could lead to uneven coloring.
then get a big enough pot for the rims to fit in. i didn’t have one, so i just took one that would accompany one rim at a time in the hopes of getting them all about the same color.

heat up some water, nice and close to the boiling point and then mix in one bag of textile coloring (mine was the kind without the fixation salt which will also work). make sure the water doesn’t boil (i’d say around 60-80° celcius is good) and throw in your rims. which would look like this.
cooking the rims

i let mine in there for exactly 25 minutes then cleaned it off and voila
one rim finished

now on to the next one.
i used a timer to get exactly another 25 minutes. turns out i had to lay it back in for another minute to get the same color tone as the first one. after doing this for all four here’s what they look like
finished rims

cool, i didn’t know exactly what color would actually come out but orange is great, like the baja prototype.

here’s the wheels mounted
fg baja

another fun experiment that turned out better than expected…

resize a directory full of images using imagemagick

people wo have image galleries on the net know that the images that come from your digital camera are usually to big. even gallery scripts that do resize the images might fall into a timeout when uploading alot of images. i used to batch resize my images with a GIMP script, but why? i don’t know. using imagemagick is ten times simpler!

mogrify -resize 800x600 "*" *.jpg

easiest possible way to go…
and with the option -quality you can also set the quality… check out the mogrify man page for more information.